Description
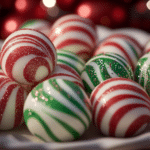
Soft Peppermint Balls are the ultimate no-bake holiday candy recipe—a creamy, minty, and festive treat that brings pure Christmas joy in every bite.
Ingredients
Scale
- 2 cups powdered sugar (confectioners’ sugar) — sifted for best results
- 1 tablespoon light corn syrup — can substitute honey or maple syrup
- 2 tablespoons unsalted butter, softened — vegan butter works well for a dairy-free option
- ½ teaspoon peppermint extract — essential for that classic mint flavor
- 1 tablespoon milk (plus more if necessary) — whole, almond, or oat milk are great choices
- Red gel food coloring — adds a vivid holiday color
- Green gel food coloring — creates a festive contrast
- Optional: edible glitter or luster dust — for a lovely finish
Instructions
- To kick off your candy-making adventure, grab a medium mixing bowl. Combine the sifted powdered sugar, corn syrup, softened butter, peppermint extract, and milk. Use a rubber spatula to mix these ingredients together until you’ve formed a smooth and pliable dough. If the mixture feels too sticky, gradually add more powdered sugar, a tablespoon at a time, until it reaches the perfect consistency akin to soft cookie dough—one that’s easy to roll but not tacky.
- Now that you’ve got your dough, it’s time to add a festive flair! Divide the peppermint dough into three equal portions. Keep one portion plain for contrast. With the second portion, add red gel food coloring, and for the third, add green. Gently knead each colored portion until the colors are uniformly blended.
- On a clean surface dusted with powdered sugar to prevent sticking, begin rolling each of the colored dough portions into ropes about ½-inch thick. If you want to create a classic striped candy look, twist all three ropes together gently and roll them again to blend the colors into a lovely pattern.
- Once your candies are formed, place them on a sheet of parchment paper. This is the perfect stage to sprinkle them lightly with edible glitter or luster dust.
- To give the candies a firm, set texture, transfer them to a tray and pop them into the refrigerator for about 30 minutes.
Notes
Store them in an airtight container in the refrigerator to maintain their freshness.
- Prep Time: 20 minutes
- Cook Time: 0 minutes
- Category: Dessert
Nutrition
- Calories: 100 kcal
- Sodium: 5 mg
- Protein: 0.5 g